Mid-range enamel pin badges, or “soft” badges, are a great option because of their cost effectiveness and versatility. They’re ideal if you’re just getting started with branded merchandise or if you intend to provide your pin badges as giveaways or small gifts.
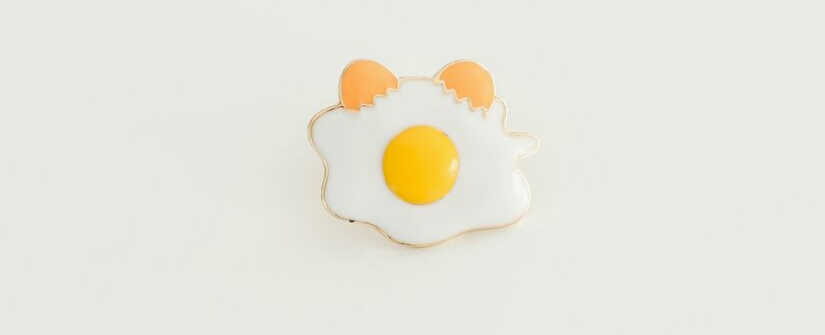
Soft enamel pin badges make use of raised metal lines and recessed enamel, which makes them feel almost bumpy to the touch. But, despite their name, soft enamel badges are still hard and also lend a precise and polished look. These highly customisable little items are a great way to showcase your creativity and your brand. They’re very sellable, quite collectible and uniquely yours. They’re also a great option for high-visibility advertising for your product or service since they get worn by people of all ages.
But, you know all of this! Have you ever wondered how exactly they’re made?
In this post, we take a slight detour from our other topics to show you how we produce one of our most popular products. From creating the design to applying it, plating it and packaging it, this is how we turn your vision into the perfect enamel pin badge. We hope you find the process interesting, we sure do!

Create the Design
Developing a design is the first step in creating any enamel badge. In our 25 years of making badges, we know that this evolves in various ways. Often times, our customers have a loose idea for a badge design but look to our expert designers to transform their idea into reality. Other times, our customers come to us with a polished company logo and just need help converting it from an existing file to a badge design. And sometimes, especially with artists and illustrators, our customers look to Rocket Badge to manufacture the creative and original badge designs they bring to us.
For more on this step of the process, see our essential guide to getting started with enamel pins. It includes some helpful tips to design and make your own unique or money-generating custom pins. For example, if you design your badge yourself, the best tool to use (if possible) is Adobe Photoshop or Adobe Illustrator; another tip is to try to use solid colours where possible, versus transparent colours or gradients.
Apply the Design
The next step on the Rocket Badge journey is to apply your design. Once the artwork is final and we have your approval, the badge moves from our expert designers to our “die sinker” specialists. This is where the magic begins to happen and your badge begins to take shape.
Using the design, the die sinker will craft the logo onto a solid piece of steel. All of the specialists who work in this department are experienced experts, as they need to be! Often, the designs that they apply are minute and highly detailed and the die sinkers need to be able to craft perfect representations of your design. The result of this is a special mould based entirely on your design.
Step two is stamping. Once the mould is created, its stamped into long-lasting brass or copper. Every mould can stamp about 10,000 impressions. That’s a lot of badges!
The last step in application is all about the shape. Once the badges have been stamped, they are cut into your desired shape.
Plating and Enamelling
Next up on the Rocket Badge journey is plating and enamelling. We like to think of this as the point at which the colour and finish of your enamel badge come alive. Once your badge design is stamped, it’s coated with a fine flash layer of high-quality nickel, gilt, bronze or antique plate. This fine metal covering will extend a special sheen and shine to each badge.
After this, our experts hand-fill the badge (yes, every one, no matter the quantity) with cold enamel paints. It’s then either fired or baked to really seal the colours in. Lastly, the badge is hand-polished to give it a special lustre. It’s a complex process but we designed it this way to ensure that your enamel badges are the most perfect and lustrous badges on the market. It’s worth it!
Cleaning and Packaging
The last stop along the journey is to clean and package the badge. After plating and enamelling, each badge goes through a thorough cleaning process and passes several quality checks before being inspected for flaws and packaged in individual poly bags.
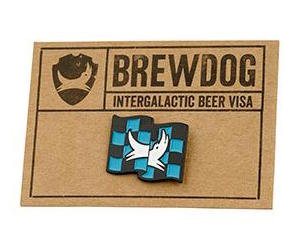
It’s also at this stage that we can apply additional packaging like branded bags, swing tags or backing cards. Especially if you plan on selling or gifting these badges, a little extra packaging will go a long way. Adding custom packaging, like backing cards or presentation boxes, will give your badges a polished, professional look and entice more customers. After all, these badges have been on quite a journey to get here, we might as well finish strong with perfect packaging!
We hope you enjoyed exploring the enamel badge-making process with us! If you haven’t quite decided on who will manufacture your badges, that’s OK. (We promise we’re not upset with you!)
Many badge manufacturers will follow the same process we outlined above, but you should also consider other things when picking the right production partner. This might include how much design assistance they offer (and how much it costs – ours is always free), how ethical the manufacturing process is and any sort of return or refund policy.
For more, see this post on the top three questions to ask in a badge manufacturer. We wish the best possible badge making journey!